You have the shirt on, the collar is up, and the tie is hanging around your neck—but somehow the knot still refuses to look right. The good news is that tying a necktie becomes surprisingly simple once you understand what the wide end is supposed to do.
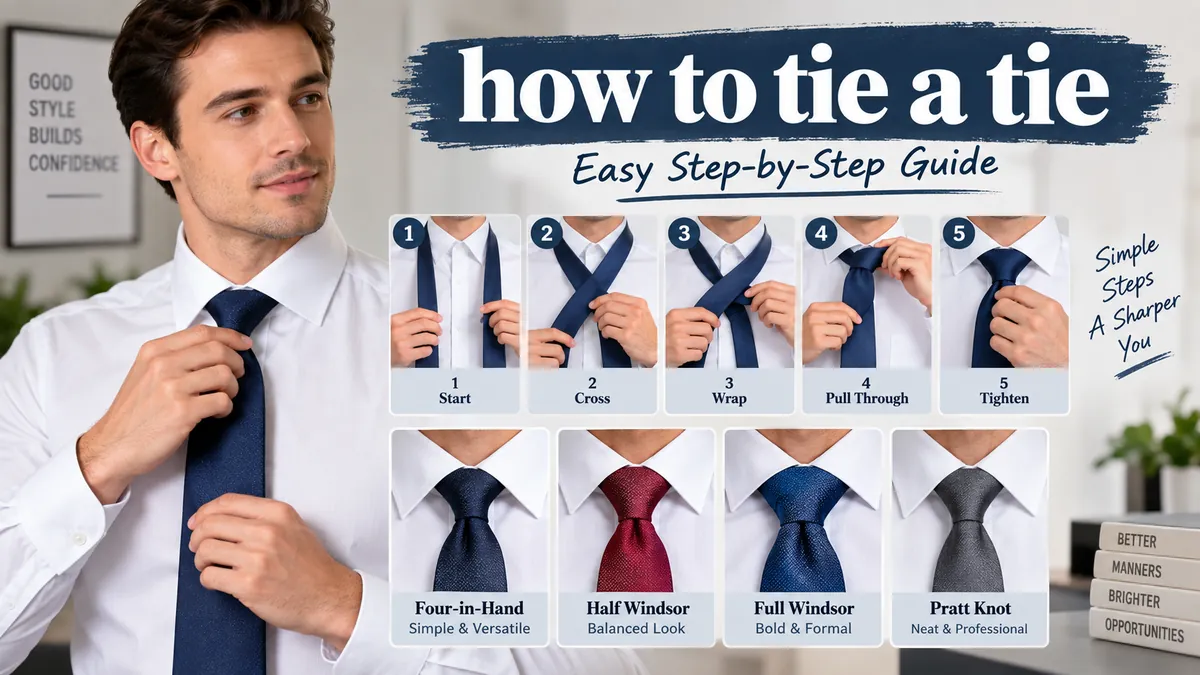
For most people learning how to tie a tie, the Four-in-Hand is the easiest place to start. Cross the wide end over the narrow end, wrap it behind and across the front, bring it up through the neck loop, pass it down through the front loop, then tighten and slide the knot toward your collar.
Once you can make that knot comfortably, you can move on to the Half Windsor, Full Windsor, and Pratt knot. Each creates a different shape and works better with certain collars, tie fabrics, and occasions.
how to tie a tie Step by Step for Beginners
Before worrying about complicated knots, learn the basic anatomy of a necktie.
A standard tie has two hanging ends:
- Wide end or wide blade: The larger end used to form most of the knot.
- Narrow end or narrow blade: The smaller end that normally stays relatively still while you work.
- Neck loop: The section of the tie surrounding your neck.
- Keeper loop: The fabric loop on the underside of the wide blade where the narrow end can be tucked after tying.
Stand in front of a mirror with your shirt collar raised and the top button fastened. Drape the tie around your neck with its front side facing outward.
For most common knots, place the wide end on your right and the narrow end on your left. The wide end should hang considerably lower because tying the knot consumes some of its length.
Don’t become too concerned about the exact starting position on your first attempt. Tie thickness, torso length, knot choice, and the length of the necktie all affect where the ends need to start.
The easiest tie knot: Four-in-Hand
The Four-in-Hand knot is an excellent first knot because it requires relatively few movements and creates a slim, slightly asymmetrical shape. It is widely presented as one of the easiest and most useful everyday necktie knots.
Here’s how to tie it:
- Place the wide end on your right and the narrow end on your left. Let the wide end hang lower.
- Cross the wide end over the narrow end toward your left.
- Take the wide end behind the narrow end toward your right.
- Bring it across the front again from right to left. You have now created a horizontal band at the front of the knot.
- Bring the wide end up through the neck loop from underneath.
- Feed the wide end down through the front loop you created in the previous steps.
- Hold the narrow end while gently pulling the wide end downward.
- Slide the knot upward until it sits comfortably against the collar.
- Straighten the tie and lower your collar.
That is the basic technique.
A useful trick is to keep the crossing point lightly pinched between your fingers while wrapping the wide blade. This stops the knot from falling apart before you feed the wide end through the final loop.
Quick Takeaway: If you need one knot for everyday use, learn the Four-in-Hand first. It is quick, relatively small, slightly asymmetrical, and particularly well suited to narrower collars and relaxed tailoring.
Which Tie Knot Should You Choose?
Learning how to tie a tie becomes much easier when you stop treating every knot as interchangeable.
The Four-in-Hand, Half Windsor, Windsor, and Pratt are among the most commonly taught useful necktie knots. They differ primarily in size, symmetry, complexity, and the amount of fabric they consume.
| Tie Knot | Shape | Knot Size | Difficulty | Good For |
|---|---|---|---|---|
| Four-in-Hand | Slightly asymmetrical | Small/slim | Easy | Everyday wear, narrower collars |
| Half Windsor | Balanced, triangular | Medium | Easy–moderate | Business, weddings, versatile styling |
| Full Windsor | Symmetrical, triangular | Large | Moderate | Formal looks, spread collars |
| Pratt/Shelby | Neat, relatively symmetrical | Medium | Easy–moderate | Business and general dress shirts |
Your shirt collar matters because the knot occupies the space between the collar points. A wide spread collar generally accommodates a fuller knot better, while a narrow or pointed collar often looks cleaner with a smaller knot.
Tie material matters too. A thick tie already creates bulk, so a large Windsor can become oversized. A thinner fabric gives you more room to build a substantial knot.
Four-in-Hand vs Half Windsor vs Full Windsor
Choose a Four-in-Hand when you want speed, simplicity, and a slimmer knot.
Choose a Half Windsor when you want more symmetry without the bulk of a Full Windsor. It produces a neat triangular knot larger than a Four-in-Hand but smaller than a Windsor.
Choose a Full Windsor when you have enough collar space for a broad, substantial triangular knot. The Windsor is traditionally associated with a fuller appearance and works particularly well with spread collars.
If you aren’t sure, the Half Windsor offers a useful middle ground.
How to Tie a Half Windsor Knot
The Half Windsor knot looks more balanced and symmetrical than the Four-in-Hand without requiring as much fabric as a Full Windsor.
It works well for business clothing, weddings, interviews, ceremonies, and other occasions where you want a polished but not oversized knot.
Half Windsor step-by-step instructions
- Drape the tie around your neck with the wide end on your right and significantly lower than the narrow end.
- Cross the wide end over the narrow end toward your left.
- Take the wide end behind the narrow end toward your right.
- Bring the wide end upward and pass it down through the neck loop.
- Pull it toward your left so you have started forming one side of the triangular knot.
- Bring the wide end across the front toward your right.
- Take it upward through the neck loop from underneath.
- Feed the wide end down through the front loop.
- Pull gently to tighten.
- Hold the narrow blade and slide the completed knot upward toward your collar.
Before fully tightening the knot, adjust both sides with your fingers. This is the easiest moment to improve its triangular shape.
The finished Half Windsor should look balanced without filling the entire space between the collar points.
How to Tie a Full Windsor Knot
The Windsor knot, frequently called the Full Windsor, creates a broad, symmetrical triangular knot. It is larger than both the Four-in-Hand and Half Windsor and therefore uses more tie length.
It is particularly useful when your shirt has enough collar spread to accommodate the extra width.
Full Windsor step-by-step instructions
- Put the tie around your neck with the wide end on your right and the narrow end on your left.
- Start with the wide blade noticeably lower than you would for a smaller knot.
- Cross the wide end over the narrow end toward your left.
- Bring the wide end up underneath the neck loop and pull it down on the left.
- Pass the wide end behind the narrow end toward your right.
- Bring it toward the neck loop and pass it through to form the opposite side of the knot.
- Bring the wide end horizontally across the front from right to left.
- Pull the wide end up through the neck loop from underneath.
- Feed it down through the front loop you just created.
- Pull gently until the knot begins to tighten.
- Shape the sides into an even triangle.
- Hold the narrow end and slide the knot toward your collar.
The goal is symmetry. If one side looks much larger than the other, loosen the knot slightly rather than trying to force it into shape after it is completely tightened.
Despite a common association with the Duke of Windsor, the Duke did not invent the Windsor knot. He was known for wearing a particularly full-looking tie knot, helped by specially made thicker ties.
How to Tie a Pratt Knot
The Pratt knot, also known as the Shelby knot, occupies useful territory between smaller and larger knots. It produces a medium-sized, tidy knot and is another practical option when you want something different from a Windsor or Four-in-Hand.
There is one major difference to remember: the Pratt begins with the tie’s underside facing outward.
Pratt knot step by step
- Drape the tie around your neck inside out, so the seam side faces forward.
- Put the wide end on your right and the narrow end on your left.
- Cross the wide end underneath the narrow end toward your left.
- Bring the wide end upward toward the neck loop.
- Pass it through the neck loop and pull it back down toward your left.
- Bring the wide end across the front of the knot toward your right.
- Take the wide end up underneath the neck loop.
- Feed it downward through the front loop you just formed.
- Tighten carefully and slide the knot toward your collar.
The Pratt is worth learning after you’ve mastered the Four-in-Hand because it provides another medium-sized option without requiring a particularly bulky knot.
How Long Should a Tie Be?
A perfectly formed knot can still look wrong when the tie hangs too high or too low.
As a practical target, the tip of the wide blade should finish around the waistband or belt area. One current tie guide recommends positioning the tip in front of the belt.
If the wide end finishes several inches above your waistband, restart with more length allocated to the wide side.
If it hangs well below the waistband, begin again with less of the wide blade hanging down.
Your starting position will change depending on:
- Your height and torso length
- The total length of the tie
- Tie thickness
- Knot size
- Collar size
- How tightly you form the knot
A Full Windsor consumes more fabric than a Four-in-Hand, so you normally need to start with the wide end hanging farther down.
After a few attempts with the same tie and knot, you’ll learn the correct starting position almost automatically.
What if the narrow end is longer than the wide end?
Don’t try to disguise a badly proportioned tie by repeatedly tightening the knot.
Untie it and restart.
Move the wide end farther down at the beginning if it finished too short. Move it upward if it finished too long. Even a one- or two-inch adjustment at the starting position can make a noticeable difference.
How to Make a Tie Dimple
A tie dimple is the small indentation immediately below the knot. It isn’t required, but it can give the front blade more shape instead of leaving the fabric completely flat.
The easiest time to make one is before the final tightening.
After feeding the wide end through the front loop:
- Pull the wide blade until the knot is nearly tight.
- Place a finger just below the center of the knot.
- Pinch the fabric gently on either side.
- Maintain the indentation while tightening the knot.
- Slide the knot toward your collar without flattening the fold.
Don’t obsess over perfect symmetry. A small natural-looking dimple usually works better than a deep crease forced into the fabric.
Common Tie-Tying Mistakes and How to Fix Them
Most beginners understand the sequence fairly quickly. What causes frustration is getting the proportions and tension right.
Starting with the wide end too short
This is probably the most annoying beginner mistake.
You complete the entire knot only to discover that the wide blade ends halfway down your shirt.
Fix: Untie it and start with the wide end lower.
Making the knot too loose
A loose knot can leave visible gaps around the collar and may lose its shape.
Fix: Tighten the knot gradually while supporting it with your fingers. Then hold the narrow blade and slide the knot upward.
Pulling everything too tight too early
The opposite problem can make shaping the knot difficult and put unnecessary strain on the fabric.
Fix: Keep the knot slightly loose until the wide blade has passed through the final front loop. Shape first, then tighten.
Twisting the wide blade
If the fabric rotates during the wrapping steps, the underside of the tie may become visible.
Fix: Keep checking that the front face remains oriented correctly as you wrap.
Choosing a knot that’s too large for the collar
A bulky Windsor squeezed between narrow collar points can make the shirt and tie look out of proportion.
Fix: Match the visual size of the knot to the available collar space. Four-in-Hand works particularly well with narrower collars, while Windsor suits wider spread collars.
Choosing a huge knot for a thick tie
Tie fabric adds its own volume. A thick material combined with a fabric-hungry knot can become bulky very quickly.
Fix: Try a Four-in-Hand or another smaller knot when the tie itself is substantial.
Hiding the narrow end badly
Many ties have a keeper loop sewn to the underside of the wide blade. Once the knot and length are correct, the narrow blade can usually be slipped through it to keep the tie tidy.
How to Get a Clean, Professional-Looking Tie Knot
Knowing the movements is only half the skill. A few finishing details make the result look intentional.
Center the knot
The knot should sit beneath the middle of your collar rather than leaning noticeably to one side.
Remember, however, that a Four-in-Hand is naturally somewhat asymmetrical. Don’t keep manipulating it in an attempt to make it look like a Windsor.
Tighten gradually
Use small adjustments rather than yanking the wide blade. This gives you more control over the knot’s shape.
Keep the collar neat
Raise the collar before tying so you can work freely around your neck. Once the knot is positioned correctly, lower the collar and make sure the collar points sit naturally.
Check the length last
Don’t judge the length while the knot is still hanging several inches below your collar. Slide it into its final position first, then check where the wide blade ends.
Practice with the same knot
Constantly switching among five different knots makes learning harder.
Practice the Four-in-Hand repeatedly until your hands remember the sequence:
over → behind → across → up → through → tighten.
Once that movement feels natural, learn the Half Windsor.
Quick Takeaway: The secret isn’t tying faster. It is learning where your particular tie needs to start and controlling the knot’s tension while you work.
What Is the Best Tie Knot for a Wedding, Interview, or Formal Event?
There isn’t one universally correct knot for every formal occasion. Collar shape, tie thickness, and the overall proportions of your outfit matter as much as the event itself.
For a job interview, a tidy Four-in-Hand or Half Windsor is usually straightforward and unobtrusive.
For a wedding, the Half Windsor is a versatile choice because it offers a balanced, formal-looking knot without the bulk of a Full Windsor. The Full Windsor can work especially well when the shirt has a spread collar and you want a larger triangular knot.
For everyday office wear, the Four-in-Hand is difficult to beat for speed and simplicity.
For a funeral or solemn event, concentrate less on finding an elaborate knot and more on keeping the tie neat and appropriately understated.
The knot should complement the clothing rather than become the main attraction.
Is the Windsor the Easiest Way to Tie a Tie?
Not usually.
The Windsor is widely recognized and creates an attractive symmetrical knot, but it requires more wrapping than the Four-in-Hand. For someone learning from scratch, the Four-in-Hand has fewer movements to remember.
A useful learning order is:
- Four-in-Hand — learn the fundamental wrapping and tightening motion.
- Half Windsor — learn how to build a more balanced triangular knot.
- Pratt/Shelby — add another medium-sized option.
- Full Windsor — learn a broader symmetrical knot for suitable collars.
There are many other decorative and traditional tie knots, but most people don’t need dozens of techniques. Four-in-Hand, Pratt, Half Windsor, and Windsor cover a broad range of everyday and formal situations. Animated Knots likewise highlights these among the common useful necktie methods.
Interestingly, mathematicians Thomas Fink and Yong Mao famously analyzed conventional necktie-knot sequences and identified 85 possible knots under the movement constraints used in their model.
You don’t need to memorize 85.
You need one knot you can tie reliably.
How to Untie a Tie Without Damaging It
After learning how to tie a tie, learning how to undo it properly is worthwhile too.
Avoid pulling the narrow end completely through a tight knot. That may seem faster, but repeated rough handling can crease and stress the fabric.
Instead:
- Loosen the knot away from your collar.
- Reverse the final step by pulling the wide blade back through the front loop.
- Continue reversing the movements used to create the knot.
- Remove the tie from your neck.
- Let it hang so wrinkles can relax.
This is especially sensible with delicate or easily creased fabrics.
If a wrinkle remains, give the tie time to recover before applying aggressive heat. Always follow the care instructions appropriate to the tie’s material.
how to tie a tie and Get It Right Every Time
If you only remember one method from this guide, make it the Four-in-Hand:
Wide end over the narrow end, behind it, across the front, up through the neck loop, down through the front loop, then tighten.
That simple sequence is enough to get most beginners comfortably wearing a necktie.
Once it becomes automatic, experiment with the Half Windsor when you want greater symmetry, the Full Windsor when a larger triangular knot suits your collar, and the Pratt/Shelby when you want a neat medium-sized alternative.
The final details matter more than complicated knot names: keep the fabric untwisted, center the knot, adjust the length around the waistband or belt, and tighten it neatly against your collar.
Practice the same knot a few times in front of a mirror rather than trying to memorize every possible style. Before long, how to tie a tie stops being a last-minute search and becomes something your hands simply remember.